Millions of businesses use Amazon to sell their products to millions and millions of customers every year. Amazon has many business solutions to aid these sellers. Fulfillment by Amazon or FBA is one among them. Amazon FBA is very helpful for business owners who may not have the storage facility to keep all of their inventory, or the manpower to pack and ship each order. In FBA, Amazon will pick, pack and ship your products, they will manage your inventory storage, they will handle product return, and don’t forget that customers prefer prime eligible sellers to get the benefits of fast shipping.
New to Amazon FBA? Don’t worry, we have you covered. Just follow this Amazon FBA Checklist, and you will be off to a great start!
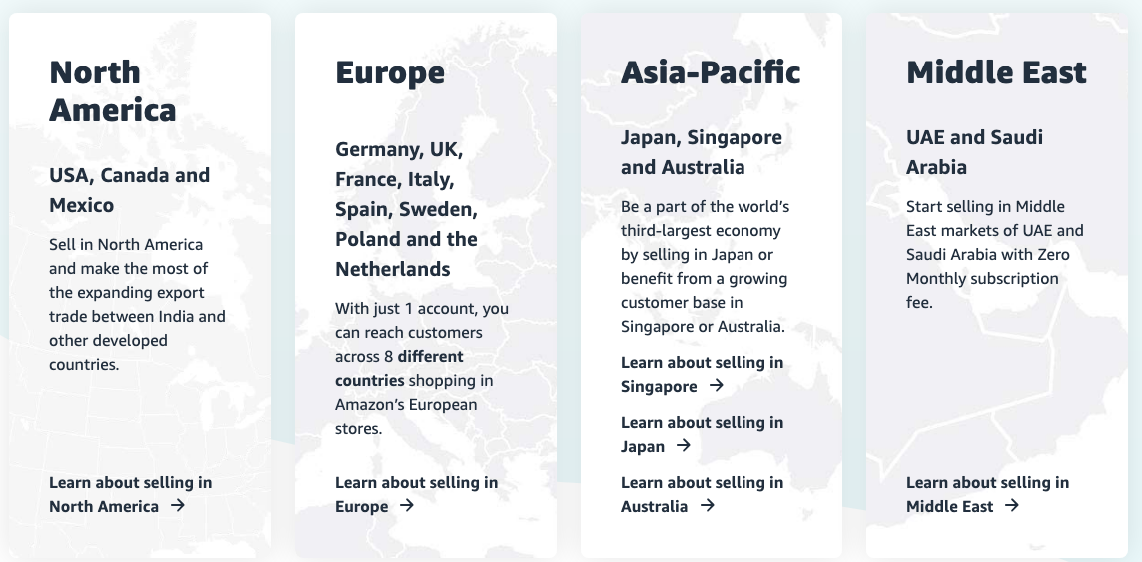
1. Choose the Right Marketplace
First, find out which marketplace will be suitable for you. It depends on the amount of investment in hand, market competition, shipping obstacles, and language barriers. Not every marketplace is profitable for every Amazon FBA seller. It’s fruitful to understand the variation in marketplaces to make the right decision about where to sell.
2. Find the Right Product
Let’s face it. It is not the 1900’s anymore. You can’t just pick up anything and start selling it. SellerApp provides the most accurate data on Amazon products for the convenience of the seller.
Instead of wasting your money on flukes, make calculated decisions about what’s trending in the market. What are people searching for? What will sell with minimal effort?
“Pro Tip – If you are partial to a certain product or niche, but there is clear evidence for you to stay away from it i.e. low search volume of the product or a highly competitive niche, don’t spend your resources on it. Always remember, Amazon FBA is a business and in business, you have to listen to your mind.”
After you find the right product, you need to make sure that your product meets the Amazon FBA standard. SourcingNova offers Amazon FBA Prep Services that can help you reduce the chance of mistakes.
3. Select a Suitable Niche
A few sellers start their FBA journey with a pre-selected niche in which they want to build their brand. Some niches are extremely tough to get into and demand a ludicrous amount of cash, whereas some are welcoming for new sellers.
Some niches are within the “Gated Categories” which require certifications and a small fee to be paid to Amazon to allow the seller to sell in those categories. Generally, the following categories and products require approval.
- Collectable Coins
- Personal Safety and Household products Fine Art
- Holiday selling requirements in Toys and Games
- Jewelry
- Amazon Subscription Boxes Made in Italy
- Music and DVD
- Automotive and Powersports products
- Services
- Sports Collectibles
- Streaming Media Players
- Video, DVD, & Blu-ray
- Watches
“Categories vary from one marketplace to another. Please visit the Amazon website relating to your selected marketplace to get more details about what you can sell.”
4. Setup your Amazon Seller Central Account
This is your “Control Panel.” With this, you’ll operate your Amazon FBA business. Due to its high importance, Amazon requires a lot of information for its creation.
Amazon Seller Central Sub-checklist:
- Business Name
- Email Address
- Credit Card
- Phone Number
- Tax ID
- State Tax ID
5. Choosing the Seller Plan
Amazon offers 2 selling plans:
Individual Selling Plan – $0.99 Per Item
Individual Selling Plan is for sellers who expect to sell less than 40 units each month.
Professional Selling Plan – $39.99 Per Month
Professional Selling Plan is for sellers who are confident that they’ll sell more than 40 units each month.
It comes with a lot of features for the sellers which are unavailable to the sellers with the Individual Selling Plan.
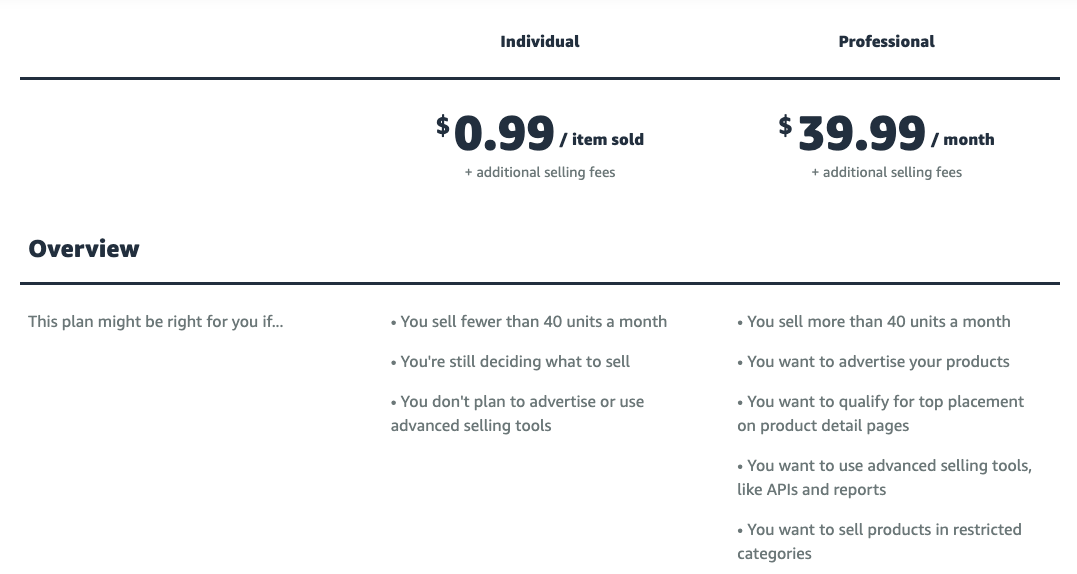
“If you want to sell more than 40 units. Hence, we recommend Professional Selling Plan to FBA sellers.”
6. Create a Dummy Listing
If you Just got your Amazon Seller Central account and are thinking about ordering your 1st shipment? Hold your horses. Set up a dummy listing in your selected category with generic images of your product. This small task will:
- Confirm whether your category is gated or not. If gated, you will need to ungate the category before you can sell.
- Make sure that the product is NOT patented.
There are two types of Patents.
- Design Patent
- Utility Patent
This small deed alone can save thousands of dollars because you won’t be able to sell your product even if you spend all your money on manufacturing and shipping, only to find out that the product was patented beforehand. Your Product Listing will be ”Put-On Hold,” and your account will be suspended.
7. Source some samples
After passing the patent check, try to find a manufacturer who can fulfill your demands in the shortest time with the highest quality.
You can search for a manufacturer on these platforms:
Choose the manufacturers based on their ratings, reviews, and order completion. Order one sample from the manufacturers you have chosen and your competitor’s manufacturer. Pick the one with the highest quality and lowest prices.
8. Prepare a Launching and Ranking Strategy
This is the most crucial part of Amazon FBA for every seller. Unless you invent a product, you’ll compete with thousands of sellers all selling the same product.
Launching: You just started selling on Amazon? So what? There are thousands of sellers selling the same product as yours. Launching involves how you’ll introduce your product on Amazon to stand out from the competition.
Ranking: Almost no one goes past the third page of Amazon. The sellers who are in the 1st place dominate the market and drive the most conversions. Reaching the top spots of the 1st page is a race in which every seller is a participant. Ranking involves how to improve the visibility of your product by promoting it to the 1st page of Amazon.
There are many ways to launch and rank your product. Each with its own merits and demerits.
9. Register as a Brand and get a trademark
Imagine Nike or Adidas, if they hadn’t registered as brands and hadn’t gotten a trademark.
Would you mind if you put in all the effort to sell on Amazon, but some unethical hijacker starts to mooch off your work? If yes, then register yourself as a brand and get a trademark. This will ensure that no one will steal your sales along with creating your identity in the market.
10. Prepare and External Traffic Source
Want to improve your sales even more? Set up a Facebook Ad campaign and direct traffic from it to your product listing. You will be surprised to see the reach you get this way. This won’t be as easy as it seems because there is a high chance of violating Amazon’s TOS with this technique.
11. Offer Discounts to Slash the Competition
By now, potential customers will be visiting your product listing. Give them another reason to buy, i.e. ”Discounts.” Surveys show that people tend to buy more when products are discounted.
12. Sell with Selling Specials
A seller can employ a variety of tactics to improve sales even more. Tactics like:
- Amazon lightning deals
- Email marketing campaigns
- Bundling
- Upselling and cross-selling
- Discount coupons/codes
- BOGOF sales
Amazon Seller Central contains updates about inventory reports, current sales promotions, and much more. You can benefit enormously from the knowledge in these halls.
Explore the article on the 3 best free email marketing services lookinglion to gain a deeper understanding of email marketing.
13. Constantly Analyze your Metrics
Are you sure you will still be turning profit 3 months from now? Is the market changing or only you are not getting your piece of the pie?
Look closely into the market details to answer these questions. You can’t run a business without having a clue. Metrics will give you the insights and the vision you need.
14. Don’t get over excited
A lot of people become over-excited as soon as they start getting a few sales. They start spending more than they are earning at that moment.
SellerApp suggests that new sellers be patient and recover their initial investment. After the Launch of the product, there is a stabilization period of 5-6 months in which the organic orders start flooding in and the expenses begin to drop. Then and only then, it is suggested to start spending your hard-earned cash.